sqldump

(coffee) => code

Scaling With Akka Streams: Fetch 1M Twitter Profiles in Less Than 5min

During these past few weeks, I’ve had a chance to play around quite a bit with the soon-to-be-1.0 Akka Streams module and I’ve been looking for a concrete reason to write about why this is an important milestone for the stream processing ecosystem. It just so happens that this week, we were conducting an experiment related to Twitter follower analysis that required pulling a few million public user profiles of followers of large Twitter accounts and the ability to do so in a relatively short amount of time. I decided to use Akka Streams for this project to see how far I could push it in a real world scenario.

App Skeleton

I decided to start with a regular Scala command line app and hardcode the Twitter ID of the person whose followers’ profiles we were attempting to retrieve (since this is going to be throwaway code just for the sake of the experiment). The only dependencies were akka-actor, akka-stream-experimental and twitter4j-core.

Twitter API Interaction

We need some way to call the Twitter API primarily for two reasons:

1) Fetch all follower IDs of a given userID
2) Fetch a user profile given a userID.

Any call made to Twiter’s API needs an authenticated twitter4j.Twitter object. Given a set of credentials, a twitter4j.Twitter object is constructed as follows:

1
2
3
4
5
6
7
8
9
10
11
12
13
14
15
16
17
18
19
import twitter4j.{Twitter, TwitterFactory}
import twitter4j.auth.AccessToken
import twitter4j.conf.ConfigurationBuilder

object TwitterClient {
    // Fill these in with your own credentials
    val appKey: String = ""
    val appSecret: String = ""
    val accessToken: String = ""
    val accessTokenSecret: String = ""

    def apply(): Twitter = {
        val factory = new TwitterFactory(new ConfigurationBuilder().build())
        val t = factory.getInstance()
        t.setOAuthConsumer(appKey, appSecret)
        t.setOAuthAccessToken(new AccessToken(accessToken, accessTokenSecret))
        t
    }
}

Given a user, return all followers

Using the TwitterClient, we can fetch a user’s profile and list of followers with the following TwitterHelpers object:

1
2
3
4
5
6
7
8
9
10
11
12
13
14
15
16
17
18
19
20
21
22
23
24
25
26
27
28
object TwitterHelpers {
    // Lookup user profiles in batches of 100
    def lookupUsers(ids: List[Long]): List[User] = {
      val client = TwitterClient()
      val res = client.lookupUsers(ids.toArray)
      res.toList
    }

    // Fetch the IDs of a user's followers in batches of 5000
    def getFollowers(userId: Long): Try[Set[Long]] = {
      Try({
        val followerIds = mutable.Set[Long]()
        var cursor = -1L
        do {
          val client = TwitterClient()
          val res = client.friendsFollowers().getFollowersIDs(userId, cursor, 5000)
          res.getIDs.toList.foreach(x => followerIds.add(x))
          if (res.hasNext) {
            cursor = res.getNextCursor
          }
          else {
            cursor = -1 // Exit the loop
          }
        } while (cursor > 0)
        followerIds.toSet
      })
    }
}

Akka Boilerplate

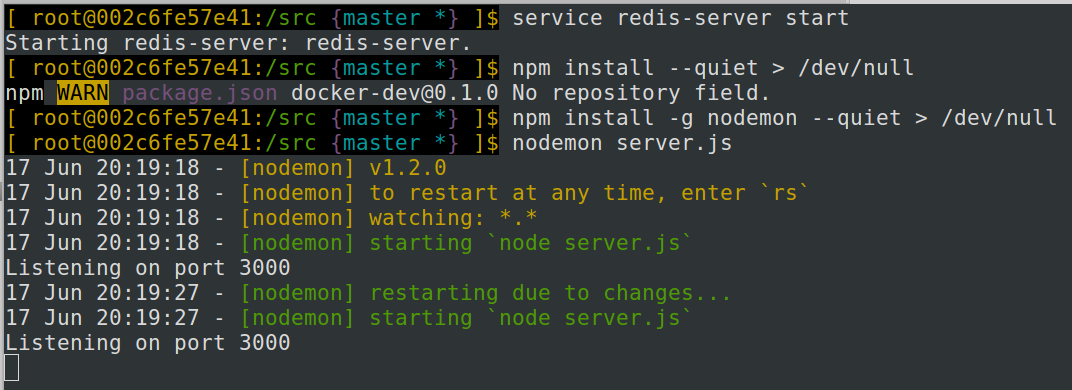
With the Twitter interactions out of the way, we can create a new command line app using:

1
2
3
4
5
6
7
8
9
10
11
12
13
object Main extends App {

  // ActorSystem & thread pools
  implicit val system: ActorSystem = ActorSystem("centaur")
  val executorService: ExecutorService = Executors.newCachedThreadPool()
  val ec: ExecutionContext = ExecutionContext.fromExecutorService(executorService)
  val log: LoggingAdapter = Logging.getLogger(system, Main)
  implicit val materializer = ActorFlowMaterializer()(system)

  // Put Stream code here
  //
  //
}

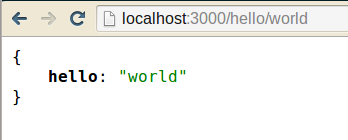
At this point, we have a working app that can be invoked using sbt run. Let’s get started on the Akka Streams bit.

The Pipeline

1
2
3
4
5
6
7
8
9
10
11
12
13
14
15
16
17
val startTime = System.nanoTime()
val userId = 410939902L // @headinthebox ~12K followers
val output = new ConcurrentLinkedQueue[String]()
Console.println(s"Fetching follower profiles for $userId")
Source(() => TwitterHelpers.getFollowers(userId).get.toIterable.iterator)
  .grouped(100)
  .map(x => TwitterHelpers.lookupUsers(x.toList))
  .mapConcat(identity)
  .runForeach(x => output.offer(x.getScreenName))
  .onComplete({
    case _ =>
      Console.println(s"Fetched ${output.size()} profiles")
      val endTime = System.nanoTime()
      Console.println(s"Time taken: ${(endTime - startTime)/1000000000.00}s")
      system.shutdown()
      Runtime.getRuntime.exit(0)
  }) (ec)

Breaking down the flow line by line

1
Source(() => TwitterHelpers.getFollowers(userId).get.toIterable.iterator)

turns the Set[Long] of follower IDs into an Akka Streams Source.

1
2
3
.grouped(100) // outputs a stream of Seq[Long]
.map(x => TwitterHelpers.lookupUsers(x.toList)) // outputs a stream of List[User]
.mapConcat(identity) // flattens the stream of List[User] into a stream of User

The group, map and mapConcat transform the stream of Longs into a stream of twitter4j.User objects.

1
.runForeach(x => output.offer(x.getScreenName))

And finally, the user objects are piped into a Sink which adds them to our output queue.

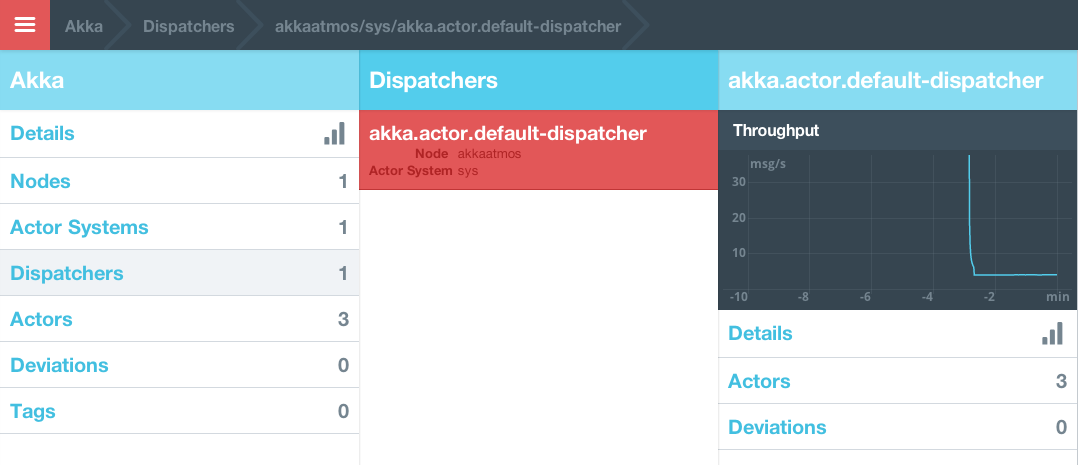
Run 1 – 12,199 profiles in 108s

Running this flow takes 108 seconds to retrieve 12,199 user profiles from Twitter.

Run 2 – 12,200 profiles in 11s

Modifying the flow slightly to allow for more concurrency helps bring down the total time taken by a large value. The obvious bottleneck in the flow implementation is the synchronous fetching of user profiles in the stage where User IDs are mapped to User profile objects. Replacing the

1
.map(x => TwitterHelpers.lookupUsers(x.toList))

with

1
.mapAsyncUnordered[List[User]](x => Future[List[User]]({ TwitterHelpers.lookupUsers(x.toList) } (ec)))

reduces the time taken from 108s to 11s. That’s almost 10x faster with a single line change!

(It looks like Erik Meijer has gained a follower between our two runs).

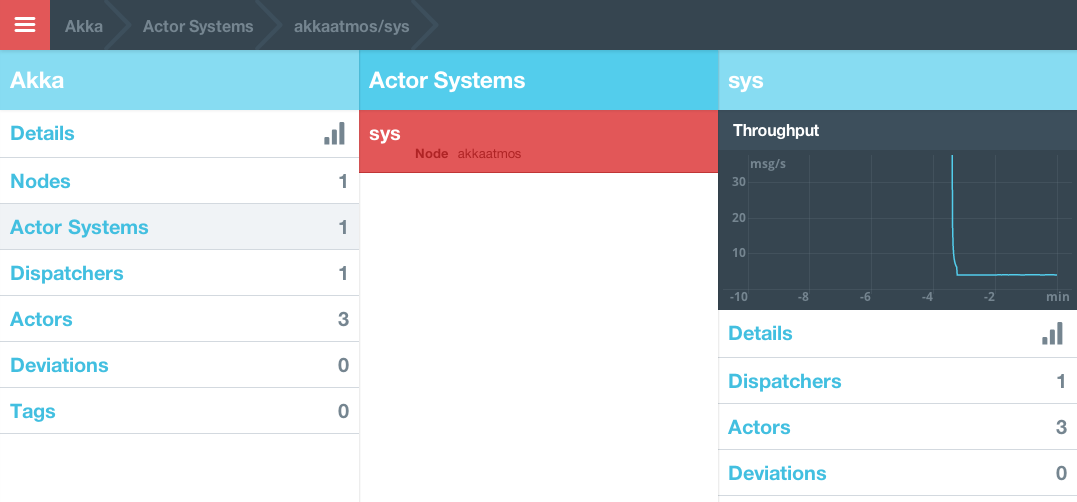
Run 3 – 1.22M profiles in 256s

Netflix USA has approximately 1.22M followers. Fetching followers for this account took 256s.

Run 4 – 2.88M profiles in 647s

Twitter co-founder Jack Dorsey has 2.88M followers and the pipeline processed them in 647 seconds.

Since Netflix (1.22M) was processed in 256s and Jack (2.88M) was processed in ~650s, it doesn’t look like the pipeline is showing any signs of exhaustion as larger accounts are being processed.

Final Thoughts

Before Akka Streams, creating a flow like this would require hand coding each stage as an actor, manually wiring everything up and carefully managing backpressure using a hybrid push/pull system alongwith finely configured timeouts and inbox sizes. Having worked on many such systems at CrowdRiff, my experience so far has been mostly positive. Akka delivers exactly what it promises – an easy way to think about concurrency, excellent performance and a great toolkit to build distributed systems. However, once built, these systems often tend to be very complex and common changes like adding stages to the pipeline or modifying existing stages have to be done very carefully (despite unit tests!). Akka Streams takes this to a whole new level by allowing the user to create arbitrary flows (check out stream graphs) in simple and easy to read manner AND managing the backpressure for you! The large quantity of awesome in this module is certainly appreciated by me and my team – many thanks to the Akka folks and everyone who contributed to the Reactive Streams project. Happy hAkking!

5-Node Cassandra Cluster. 1 Command.

[2014-09-16] Update: The command now brings up a 5-node Cassandra cluster in addition to DataStax OpsCenter 5.0.0 and wires it all up together. See the GitHub repo for details. Each node runs in its own container with the Cassandra process + DataStax Agent while OpsCenter runs in its own container separate from the cluster.

[Original Post]

Run this command to bring up a 5-node Cassandra (2.1.0) cluster locally using Docker.

1
bash <(curl -sL http://bit.ly/docker-cassandra)

This will:
1. Pull the abh1nav/cassandra:latest image.
2. Start the first node with the name cass1
3. Start cass2..5 with the environment variable SEED=<ip of cass1>

Manual mode

If you don’t like or trust the one liner, here’s how to do it manually.

Single Node Setup

To start the first node, pull the latest version of image:

1
docker pull abh1nav/cassandra:latest

Start the first instance:

1
docker run -d --name cass1 abh1nav/cassandra:latest

Grab its IP using:

1
SEED_IP=$(docker inspect -f '{{ .NetworkSettings.IPAddress }}' cass1)

Connect to it using cqlsh:

1
cqlsh $SEED_IP

The expected output is:

1
2
3
4
5
6
✈ megatron /opt/cassandra
 ↳ bin/cqlsh $SEED_IP
Connected to Test Cluster at 172.17.0.47:9160.
[cqlsh 4.1.1 | Cassandra 2.1.0 | CQL spec 3.1.1 | Thrift protocol 19.39.0]
Use HELP for help.
cqlsh>

Cluster Setup

Once your single node is setup, you can add more nodes using:

1
2
3
4
5
for name in cass{2..5}; do
  echo "Starting node $name"
  docker run -d --name $name -e SEED=$SEED_IP abh1nav/cassandra:latest
  sleep 10
done

You can watch the cluster form by tailing the logs on cass1:

1
docker logs -f cass1

Once the cluster is up, you can check its status using:

1
nodetool --host $SEED_IP status

The expected output is:

1
2
3
4
5
6
7
8
9
10
11
12
✈ megatron /opt/cassandra
 ↳ bin/nodetool --host $SEED_IP status
Datacenter: datacenter1
=======================
Status=Up/Down
|/ State=Normal/Leaving/Joining/Moving
--  Address      Load       Tokens  Owns (effective)  Host ID                               Rack
UN  172.17.0.47  54.99 KB   256     37.3%             cb925207-ff79-4d1e-84ce-ac6c59353df4  rack1
UN  172.17.0.48  85.8 KB    256     39.4%             baa1b2c1-8f51-4e20-9c33-44cb5f45a4c0  rack1
UN  172.17.0.49  69.35 KB   256     40.1%             d1f96d59-c084-4ba3-a717-4269098cc854  rack1
UN  172.17.0.50  68.92 KB   256     40.2%             d514e844-e07a-4896-ace8-a0b43e25d6fc  rack1
UN  172.17.0.51  69.39 KB   256     43.0%             464cdf00-39e3-4efe-8a9f-83fc5ba839c9  rack1

Check out the Docker registry page for the image and the GitHub repo to grab the source.

Unit Testing Futures With ScalaTest

Unit testing methods that return futures in Scala is quite straightforward using ScalaTest 2.0+

1
2
3
4
5
6
7
8
9
10
11
12
13
import org.scalatest.FunSuite
import org.scalatest.concurrent.ScalaFutures
import scala.concurrent.Future

class NiceClass$Test extends FunSuite with ScalaFutures {
  test("Test a method that returns a future") {
    val f: Future[Boolean] = somethingThatReturnsAFuture()

    whenReady(f) { result =>
      assert(result)
    }
  }
}

If your future is making a web service call or doing some sort of IO that takes a few seconds to complete, you might encounter an error like this one:

1
2
A timeout occurred waiting for a future to complete.
Queried 11 times, sleeping 15 milliseconds between each query.

You can fix this by telling ScalaFutures how long it should to wait before declaring that the future has timed out.

1
2
3
4
import org.scalatest.time.{Millis, Seconds, Span}

implicit val defaultPatience =
  PatienceConfig(timeout = Span(5, Seconds), interval = Span(500, Millis))

Happy testing!

Hackathon: Bike Share Toronto

This past weekend, I had the pleasure of being a participant at the Bike Share Toronto Hackathon & Design Jam. This was my first time attending an Open Data related hackathon in Toronto and simply put, the experience was absolutely phenomenal. 36 hours of non-stop hacking on data related to usage of the Bike Share Toronto service combined with the data from the Cycling App made available by the City of Toronto with the singular aim of getting more people on bikes.

The Concept

Team Fixie decided to appeal to the users’ common sense by presenting a comparison of various modes of transportation before embarking on a trip.

In a nutshell, the responsive web app asks for details about your trip, such as the reason for the trip, start / end locations and optionally a time of arrival.

It then presents you with three options that include realistic time estimates (as opposed to average speed based estimates provided by Google Maps) by accounting for factors such as weather and average speeds typically achieved by cyclists during the time of day around the arrival time.

When assessing the Bike Share option, Fixie includes the time required to walk from your starting point to the nearest Bike Share station, the time required to bike from the first Bike Share station to the Bike Share station nearest to your destination and the time required to walk to your destination from the second Bike Share station.

Similarly, when calculating the time required for you to ride your own bike, Fixie includes the time required to bike from your starting point to the bike lock post nearest to your destination (so you can secure your bike) and the time required to walk to your destination from the bike post.

For public transit, driving and walking directions, it relies entirely on Google Maps.

The Hack

The front end is backed by NodeJS / ExpressJS REST API and the client side is built using HTML5, SASS and AngularJS. The auto-complete for address boxes is powered by the Google Maps Javascript API v3 and location detection is enabled using the HTML5 Geo-Location API. The entire javascript layer is uses GulpJS to build and package itself.

The Javascript layer talks to a Python REST API written using CherryPy to calculate the time for each type of trip. The python backend talks to the Google Directions API to generate waypoints for a trip and also encapsulates the SciKit Learn model that predicts travel times between waypoints for a given time of day.

Datasets Used

The machine learning system that predicts travel time was trained using data from City of Toronto Cycling App data and the Bike Share data. The difficulty here was that the Bike Share data did not provide the change in elevation for the trip and an analysis of the model’s features indicated that altitude change was fairly important to ensure an accurate prediction. Using the Google Elevation API, we were able to approximate the change in altitude for each Bike Share trip and mix that data to enhance the provided dataset and help train the model.

The python service also used the Bicycle Post and Ring Locations dataset provided by the City of Toronto as well as the Bike Share Station dataset to help plan the waypoints for bike trips.

Conclusion

At the end some amazing ideas, prototypes and implementations were presented by the 9 participating groups to a packed audience. All in all, the hackathon was a smashing success. I wanted to put this post up to catalogue the concept and implementation that our team came up with, just so I’d have something to refer back to, or in case someone else finds some use for it.

I’d like to thank Alex Mansourati, Kent English and Kaye Mao for making Team Fixie awesome. Last but not least, a big thank you to all the organizers and sponsors for making this event happen. Shout outs to Bianca Wylie, Naomi Freeman, Allison Buchan-Terrell, Michael Markieta, Matthew Browning and Anelia.

Kickstart a Couchbase Cluster With Docker

A few days ago, I was officially introduced to Couchbase at a Toronto Hadoop User Group meetup. I say “officially” because I’ve known about some Couchbase use-cases / pros and cons on a high level since v1.8, but never really had the time to look at it in detail.

As the presentation progressed, it got me interested in actually tinkering around with a Couchbase cluster (kudos to Don Pinto). My first instinct was to head over to the Docker Registry and do a quick search for couchbase. Using the dustin/couchbase image, I was able to get a 5-node cluster running in under 5 minutes.

Run 5 containers

1
2
3
4
5
docker run -d -p 11210:11210 -p 11211:11211 -p 8091:8091 -p 8092:8092 --name cb1 dustin/couchbase
docker run -d --name cb2 dustin/couchbase
docker run -d --name cb3 dustin/couchbase
docker run -d --name cb4 dustin/couchbase
docker run -d --name cb5 dustin/couchbase

Find Container IPs

Once the containers were up, I used docker inspect to find their internal IPs (usually in the 172.17.x.x range). For example, docker inspect cb1 returns

1
2
3
4
5
6
7
8
9
10
11
12
[{
    "Args": [
        "run"
    ],
    "Config": {
        "AttachStderr": false,
    ...
    "NetworkSettings": {
        "Bridge": "docker0",
        "Gateway": "172.17.42.1",
        "IPAddress": "172.17.0.27",
    ...

Update: Nathan LeClaire from Docker was kind enough to write up a quick script that combines these two steps:

1
2
3
4
5
6
7
8
9
docker run -d -p 11210:11210 -p 11211:11211 -p 8091:8091 -p 8092:8092 --name cb1 dustin/couchbase

for name in cb{2..5}; do 
    docker run -d --name $name dustin/couchbase
done

for name in cb{1..5}; do
    docker inspect -f '{{ .NetworkSettings.IPAddress }}' $name
done

Setup Cluster using WebUI

If cb1 is at 172.17.0.27, then the Couchbase management interface comes up at http://172.17.0.27:8091 and the default credentials are:

1
2
Username: Administrator
Password: password

Once you’re in, setting up a cluster is as easy as clicking “Add Server” and giving it the IPs of the other containers. As soon as you add a new server to the cluster, Couchbase will prompt you to run a “Cluster Rebalance” operation – hold off until you’ve added all 5 nodes and then run the rebalance.

Push some data into the cluster

Once the cluster was up, I wanted to get a feel for how the WebUI works so I wrote this script to grab some data from our existing cluster of JSON-store-that-I-am-too-ashamed-to-mention and added it to Couchbase:

1
2
3
4
5
6
7
8
9
10
11
12
13
#!/usr/bin/env python
# encoding: utf-8

from pymongo import MongoClient
from couchbase import Couchbase

src = MongoClient(['m1', 'm2', 'm3'])['twitter_raw']['starbucks']
tar = Couchbase.connect(bucket='twitter_starbucks',  host='localhost')

for doc in src.find():
  key = str(doc['_id'])
  del doc['_id']
  result = tar.set(key, doc)

The Couchbase python client depends on libcouchbase. Once those two were installed, and the twitter_starbucks bucket had been created in Couchbase, I was able to load ~100k JSON documents in a matter of minutes.

Docker + NodeJS Dev Environment: Take 2 - Container Linking

I’ve had lots of feedback on my previous post and I’d like to share some of it which I found especially helpful.

Mathieu Larose sent over a much shorter one-liner that installs Node in the docker container. This means my original Dockerfile step

Dockerfile
1
2
3
4
5
6
7
8
RUN  \
  cd /opt && \
  wget http://nodejs.org/dist/v0.10.28/node-v0.10.28-linux-x64.tar.gz && \
  tar -xzf node-v0.10.28-linux-x64.tar.gz && \
  mv node-v0.10.28-linux-x64 node && \
  cd /usr/local/bin && \
  ln -s /opt/node/bin/* . && \
  rm -f /opt/node-v0.10.28-linux-x64.tar.gz

turns into

Dockerfile
1
2
3
4
RUN \
  wget -O - http://nodejs.org/dist/v0.10.29/node-v0.10.29-linux-x64.tar.gz \
  | tar xzf - --strip-components=1 --exclude="README.md" --exclude="LICENSE" \
  --exclude="ChangeLog" -C "/usr/local"

The second piece of feedback was via Twitter from Darshan Shankar

As I explained on Twitter and at the end of the previous post, having Redis and Node in the same container was meant only to demonstrate how Docker works to first-timers. It isn’t recommended as a production setup.

Unbundling Redis and Container Links

Since I’ve already agreed that having Redis and Node together is probably not the greatest idea, I’m going to take this opportunity to fix this mistake and demonstrate container linking at the same time.

The fundamental idea is to strive for single-purpose Docker containers and then compose them together to build more complex systems. This implies we need to rip out the Redis related bits from our old Dockerfile and run Redis in a Docker container by itself.

Redis in a Docker container

Now that we’ve decided to unbundle Redis, let’s run it in its own container. Fortunately, as is often the case with Docker, someone else has already done the hard work for us. Running Redis locally is as simple as:

1
docker run -d --name="myredis" -p 6379:6379 dockerfile/redis

You’ll notice the extra --name="myredis" parameter. We’ll use that in the next step to tell our app’s container about this Redis container.

Dockerfile update

The next step is to update our Dockerfile and exclude the Redis-related instructions.

Dockerfile
1
2
3
4
5
6
7
8
9
10
11
12
13
14
15
16
17
18
FROM dockerfile/ubuntu

MAINTAINER Abhinav Ajgaonkar <abhinav316@gmail.com>

# Install pre-reqs
RUN   \
  apt-get -y -qq install python

# Install Node
RUN \
  wget -O - http://nodejs.org/dist/v0.10.29/node-v0.10.29-linux-x64.tar.gz \
  | tar xzf - --strip-components=1 --exclude="README.md" --exclude="LICENSE" \
  --exclude="ChangeLog" -C "/usr/local"

# Set the working directory
WORKDIR   /src

CMD ["/bin/bash"]

Build, Link and Run

Our app image can now be built with:

1
docker build -t sqldump/docker-dev:0.2 .

Once the build has completed, we can launch a container using the image. The command for launching an instance of this image also needs to be modified slightly:

1
2
3
4
5
6
7
docker run -i -t --rm                     \
      -p 3000:3000                        \
      -v `pwd`:/src                       \
      --name="myapp"                      \
      --link myredis:myredis              \
      -e REDIS_HOST="myredis"             \
      sqldump/docker-dev:0.2

Here, I’ve used the --link option to tell the myapp container about the redis container. The --link option allows linked containers to communicate securely over the docker0 interface. When we link the myredis container to the myapp container, myapp can then access services on myredis just by using the hostname and the hostname-to-IP resolution will be handled transparently by Docker.

I’ve also injected an environment variable called REDIS_HOST using the -e flag to tell our node app where to find the linked Redis.

Once the container is running, you can utilize the methods described in the previous post to install dependencies and get your server running.

I hope this provides a satisfactory demonstration of how linked containers can be used to compose single-purpose docker containers into a more complex working system.

Develop a NodeJS App With Docker

This is the first of two posts. This post covers a somewhat detailed tutorial on using Docker as a replacement for Vagrant when developing a Node app using the Express framework. To make things a bit non-trivial, the app will persist session information in Redis using the connect-redis middleware. The second post will cover productionizing this development setup.

The Node App

The app consists of a package.json, server.js and a .gitignore file, which is about as simple as it gets.

.gitignore
1
node_modules/*
package.json
1
2
3
4
5
6
7
8
9
10
11
{
    "name": "docker-dev",
    "version": "0.1.0",
    "description": "Docker Dev",
    "dependencies": {
        "connect-redis": "~1.4.5",
        "express": "~3.3.3",
        "hiredis": "~0.1.15",
        "redis": "~0.8.4"
    }
}
server.js
1
2
3
4
5
6
7
8
9
10
11
12
13
14
15
16
17
18
19
20
21
22
23
24
25
26
27
28
29
30
var express = require('express'),
    app = express(),
    redis = require('redis'),
    RedisStore = require('connect-redis')(express),
    server = require('http').createServer(app);

app.configure(function() {
  app.use(express.cookieParser('keyboard-cat'));
  app.use(express.session({
        store: new RedisStore({
            host: process.env.REDIS_HOST || 'localhost',
            port: process.env.REDIS_PORT || 6379,
            db: process.env.REDIS_DB || 0
        }),
        cookie: {
            expires: false,
            maxAge: 30 * 24 * 60 * 60 * 1000
        }
    }));
});

app.get('/', function(req, res) {
  res.json({
    status: "ok"
  });
});

var port = process.env.HTTP_PORT || 3000;
server.listen(port);
console.log('Listening on port ' + port);

server.js pulls in all the dependencies and starts an express app. The express app is configured to store session information in Redis and exposes a single endpoint that returns a status message as JSON. Pretty standard stuff.

One thing to note here is that the connection information for redis can be overridden using environment variables – this will be useful later on when moving from dev to prod.

The Dockerfile

For development, we’ll have redis and node running in the same container. To make this happen, we’ll use a Dockerfile to configure the container.

Dockerfile
1
2
3
4
5
6
7
8
9
10
11
12
13
14
15
16
17
18
19
20
21
22
FROM dockerfile/ubuntu

MAINTAINER Abhinav Ajgaonkar <abhinav316@gmail.com>

# Install Redis
RUN   \
  apt-get -y -qq install python redis-server

# Install Node
RUN   \
  cd /opt && \
  wget http://nodejs.org/dist/v0.10.28/node-v0.10.28-linux-x64.tar.gz && \
  tar -xzf node-v0.10.28-linux-x64.tar.gz && \
  mv node-v0.10.28-linux-x64 node && \
  cd /usr/local/bin && \
  ln -s /opt/node/bin/* . && \
  rm -f /opt/node-v0.10.28-linux-x64.tar.gz

# Set the working directory
WORKDIR   /src

CMD ["/bin/bash"]

Taking it line by line,

1
FROM dockerfile/ubuntu

This tells docker to use the dockerfile/ubuntu image provided by Docker Inc. as the base image for the build.

1
2
RUN  \
  apt-get -y -qq install python redis-server

The base image contains absolutely nothing- so we need to apt-get everything needed for our app to run. This statement installs python and redis-server. Redis server is required because we’ll be storing session info in it and python is required by npm to be able to build the C-extension used by the redis node module.

1
2
3
4
5
6
7
8
RUN  \
  cd /opt && \
  wget http://nodejs.org/dist/v0.10.28/node-v0.10.28-linux-x64.tar.gz && \
  tar -xzf node-v0.10.28-linux-x64.tar.gz && \
  mv node-v0.10.28-linux-x64 node && \
  cd /usr/local/bin && \
  ln -s /opt/node/bin/* . && \
  rm -f /opt/node-v0.10.28-linux-x64.tar.gz

This downloads and extracts the 64-bit NodeJS binaries.

1
WORKDIR  /src

This tells docker to cd /src once the container has started, before executing what’s specified in the CMD property.

1
CMD ["/bin/bash"]

Launch /bin/bash as a final step.

Build and run the container

Now that the docker file is written, let’s build a Docker image.

1
docker build -t sqldump/docker-dev:0.1 .

Once the image done building, we can launch a container using:

1
2
3
4
docker run -i -t --rm \
           -p 3000:3000 \
           -v `pwd`:/src \
           sqldump/docker-dev:0.1

Let’s see what’s going on in the docker run command.

-i starts the container in interactive mode (versus -d for detached mode). This means the container will exit once the interactive sessions is over.

-t allocates a pseudo-tty.

--rm removes the container and its filesystem on exit.

-p 3000:3000 forwards port 3000 on to the host to port 3000 on the container.

1
-v `pwd`:/src

This mounts the current working directory in the host (i.e. our project files) to /src inside the container. We mount the current folder as a volume rather than using the ADD command in the Dockerfile so that any changes we make to the files in a text editor will be seen by the container right away.

sqldump/docker-dev:0.1 the name and version of the docker image to run – this is the same one we used when building the docker image.

Since the Dockerfile specifies CMD ["/bin/bash"], we’re dropped into a bash shell once the container has started. If the docker run command succeeds, it’ll look something like this:

Start Developing

Now that the container is running, we’ll need to get a few standard, non-docker related things sorted out before we can start writing code. First, start redis server inside the container using:

1
service redis-server start

Then, install project dependencies and nodemon. Nodemon watches for changes in project files and restarts the server as needed.

1
2
npm install
npm install -g nodemon

Finally, start up the server using:

1
nodemon server.js

Now, if you go to http://localhost:3000 in your browser, you should see something like this:

Let’s add another endpoint to server.js to simulate development workflow:

server.js
1
2
3
4
5
app.get('/hello/:name', function(req, res) {
  res.json({
    hello: req.params.name
  });
});

You should see that nodemon has detected your changes and restarted the server:

And now, if you point your browser to http://localhost:3000/hello/world, you should see the response:

Production

The container, in its current state, is nowehere near production-ready. The data in redis won’t be persisted across container restarts, i.e. if you restart the container, you’ll have effectively blown away all your session data. The same thing will happen if you destroy the container and start a new one. Presumably, this is not what you want. I’ll cover production setup in part II.

Tracing Akka Projects With Atmos

Atmos is an SBT plugin that allows you to trace Akka and Play projects to help identify and fix bottlenecks.

Installation

Add the following lines to your project:

project/plugins.sbt
1
addSbtPlugin("com.typesafe.sbt" % "sbt-atmos" % "0.3.2")
build.sbt
1
2
3
atmosSettings

atmosTestSettings

Usage

1
sbt atmos:run

The Atmos UI comes up on localhost:9900.

Screenshots

Atmos has a great overview screen that shows you vital system-wide statistics.

It also allows you to drill down and dig into dispatcher-level as well as ActorSystem level stats.

And, best of all, it shows you Actor-level stats like message throughput, mailbox size over time as well as mean time spent in mailbox- which are extremely helpful when tracing bottlenecks.

I’ve put up a working project with Atmos here. It’ll run for about 5 minutes so you can explore the Atmos UI and then terminate. If you want to give it a try:

1
2
3
git clone https://github.com/sqldump/akka-atmos.git
cd akka-atmos
sbt atmos:run

Scaffolding an Akka Project

Every time I’ve needed to start a new Akka project, I’ve had to go through the process of scaffolding a new project from scratch. So I finally got around to creating a skeleton project that includes the bare minimum dependencies along with a build file, plugins and configuration required to create a fat jar as well as the ability to run in place. You can find the akka-skeleton project here.

To get going with akka-skeleton,

  1. Modify the organization, name & version in build.sbt
  2. Rename the package heirarchy under src/main/scala
  3. Ensure you have atleast one class that extends App
  4. sbt run

Included Dependencies

  1. Akka Actor Module
  2. Akka Agent Module
  3. Google Guava
  4. Joda Time (and joda-convert to make it work correctly with Scala)
  5. JUnit, ScalaTest and Akka TestKit
  6. Akka SLF4J Adapter

File Structure

The project root looks like this:

1
2
3
project/
src/
build.sbt

project

The project folder contains all the files that help SBT build the project.

1
2
3
4
project
|-Dependencies.scala
|-build.properties
|-plugins.sbt
  • build.properties describes the SBT version used to build the project
  • plugins.sbt describes all the SBT plugins used to build the project – for example, the assembly plugin is used to create a fat jar of the project including all the dependencies
  • Dependencies.scala describes all the project dependencies – objects from here are imported by the build.sbt file when building the project

The src folder contains the project source, test and resource files.

Build, Run and Assembly

sbt clean to clean.
sbt compile to build.
sbt run to run.
sbt assembly to create a fat jar.

Setup a Spark Cluster in 5 Minutes

Prerequisites

Assuming you have 3 nodes: node1, node2, node3, ensure the hosts file contains the following entries on all nodes:

1
2
3
192.168.1.100  node1
192.168.1.101  node2
192.168.1.102  node3

Be sure replace 192.168.x.x with the actual IPs for each node.

Get Spark

Download binaries from http://spark.apache.org/downloads.html and extract it to /opt/.

Spark Master

Start the master process on node1

1
2
cd /opt/spark-0.9.0-incubating-bin-hadoop1
sbin/start-master.sh

Spark Workers

Start worker processes on each node:

1
2
cd /opt/spark-0.9.0-incubating-bin-hadoop1
bin/spark-class org.apache.spark.deploy.worker.Worker spark://node1:7077

Check the Spark UI at http://node1:8080 to make sure all workers have registered with the master.